

How to hand milk a cow
To hand milk a cow, first clean the udder and teats, then sit or stand beside the cow with a clean bucket under the udder. Hold the teat near the top with your thumb and forefinger to trap milk, then squeeze the rest of your fingers in order to push milk out in a steady stream. Work one teat at a time, keep a calm rhythm, and strain and chill the milk immediately when you finish.
Before you start: calm cow, clean hands, clean gear
Hand milking works best when the cow is relaxed and the setup is simple. Choose a quiet place with good footing, such as a stanchion, tie stall, or a well-bedded pen. A nervous cow may kick, shift, or hold up milk, so approach her slowly and speak in a steady voice. Many small dairies still use stainless steel buckets because they are easy to wash and do not absorb odors like plastic can. Keep the bucket close to the udder but far enough back that the cow cannot step into it.
Wash your hands thoroughly, then wash and dry the udder and teats with warm water and a clean towel or disposable paper towel. In dairy practice, the goal is not just visible cleanliness but reducing teat-end bacteria before milking. A separate towel for each cow is best. If the teats are dirty with manure or bedding, clean them first; do not start milking through debris. If the cow has long tail hair, tie it aside so it does not flick dirt into the bucket.
What you need at the milking stand
A simple hand-milking kit does not need to be fancy, but it should be practical and sanitary. The basics are a clean stainless steel bucket, warm water, mild udder wash or plain water, clean towels, and a post-milking teat dip if you use one. Some dairies also keep a strip cup or black-bottom cup for checking the first streams of milk for clots, flakes, or watery milk that may signal mastitis. If you want a more formal setup, a milking stool can reduce strain on your back and knees.
| Item | Why it matters | Notes |
|---|---|---|
| Stainless steel bucket | Easy to sanitize and less likely to hold odors | Set it where the cow cannot kick or step on it |
| Clean towels | Removes dirt before milking | Use one towel per cow when possible |
| Strip cup | Lets you inspect the first milk streams | Useful for spotting mastitis signs early |
| Teat dip | Helps protect teat ends after milking | Commonly iodine- or chlorhexidine-based |
The hand-milking motion, step by step
Use the full-hand method, not a pinch. Start by wrapping your thumb and forefinger around the top of the teat, close to the udder, to trap milk in the teat canal. Then close your middle finger, ring finger, and little finger in sequence so the milk is pushed downward and out. Release in the same order so the teat refills. This rolling squeeze is smoother and less painful than tugging straight down on the teat. A good rhythm is steady rather than fast; speed comes with practice, not force.
Milk one teat at a time or alternate between teats in a pattern that feels comfortable. Many milkers use both hands at once on opposite teats to keep the flow moving. If the teat is long and the flow is strong, you can keep a bucket under the udder and work efficiently. If a teat is short or the cow is fidgety, slow down and keep your hands close to the teat end. Avoid pulling, twisting, or dragging the teat, because that can cause soreness and make the cow less willing to stand for the next milking.
For more on this, see our related guide: Optimizing Dairy Cow Feeding Schedule by Lactation Stage for Peak Milk Production.
How to position yourself beside the cow
Most right-handed milkers stand or sit on the cow’s right side, slightly behind the front leg and in line with the udder. Left-handed milkers often prefer the opposite side. The exact position matters less than staying balanced and out of kicking range. Keep one shoulder close enough to work comfortably, but do not lean under the cow or place your face near the udder. A milk stool can help you keep a stable posture, especially if the cow is large or the udder hangs low.

Watch the cow’s body language. A relaxed cow usually stands square, chews cud, and keeps her tail loose. A cow that shifts weight, swishes her tail sharply, pins her ears, or tenses her belly may be telling you she is uncomfortable. If she kicks at the bucket, stop and reset. Some handlers gently tie the cow’s head or use a stanchion to improve control, but restraint should always be calm and secure rather than rough.
Finish the milking cleanly
When the milk flow slows, strip the teats by hand to remove the last milk. This helps empty the udder more completely and lets you feel for abnormal lumps or heat. Emptying the udder matters because leftover milk can create pressure and reduce comfort, and in a dairy herd it can affect udder health over time. Once the cow is finished, dip each teat if you use a teat dip program, then give her a small amount of feed or let her relax before moving her. Many producers pair milking with grain or a ration so the cow associates the routine with something positive.
Carry the milk to a clean area right away. Filter it through a sanitized milk strainer or clean cloth designed for milk handling, then cool it as fast as possible. The USDA and dairy quality programs emphasize rapid cooling because bacteria multiply quickly in warm milk. If you are milking for household use, chill the milk promptly in a refrigerator or ice bath. Wash the bucket, towels, and any reusable tools with hot water and detergent after every milking session, then let them dry fully.
Common mistakes that make hand milking harder
New milkers often make the mistake of pulling down on the teat instead of squeezing from the top. That usually slows the flow and can irritate the cow. Another common error is milking with dirty hands or a dirty udder, which increases the chance of contaminating the milk. Some people also place the bucket too far forward, where a shifting hoof can hit it. A bucket knocked over by a cow is frustrating, wastes milk, and can startle both of you.
If you’re also looking into this, our article on Understanding Total Mixed Ration (TMR) for Dairy Cows: A Complete Guide covers it in more detail.
Rushing is another problem. If you squeeze too hard or too fast, your hands tire quickly and the cow may become restless. A better approach is smooth, repeatable pressure. If the cow has very full quarters, uneven milk flow, or signs of pain, do not force the issue. Watch for swelling, heat, clots, or a quarter that feels hard compared with the others. Those signs can point to mastitis or another udder problem that needs attention.
How hand milking compares with machine milking
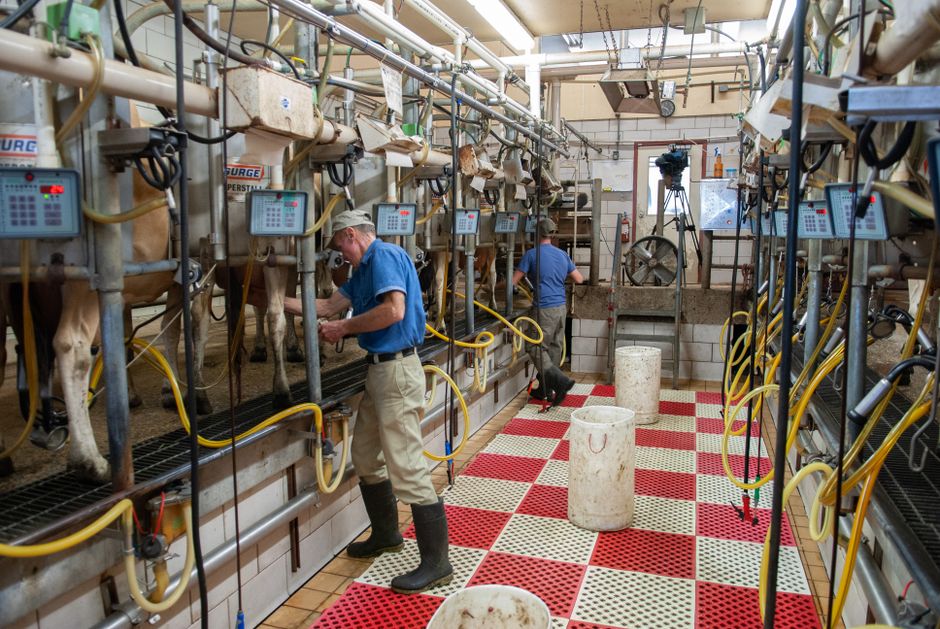
Hand milking and machine milking can both work well, but they suit different situations. Hand milking is useful for small herds, freshening cows, or times when you need to milk a single cow without a machine. Machine milking is faster for larger dairies and more consistent when the system is properly maintained. The right choice depends on herd size, labor, and whether you need mobility or volume. For a homestead cow, hand milking can be practical and quiet; for a herd of many cows, a machine usually saves time.
| Factor | Hand milking | Machine milking |
|---|---|---|
| Setup cost | Low | Higher |
| Speed | Slower | Faster |
| Portability | Very high | Lower |
| Best for | Small herds, emergency milking, home use | Multiple cows, routine dairy production |
| Learning curve | Technique matters a lot | Equipment and maintenance matter a lot |
Frequently Asked Questions
How long does it take to hand milk a cow?
For most cows, hand milking takes roughly 5 to 15 minutes once you are comfortable with the technique. A first-time milker may take longer because the rhythm is unfamiliar and the cow may move around more. Udder size, milk volume, and the cow’s temperament all affect the time.
Can you hand milk any cow breed?
Yes, but different breeds and individual cows behave differently. Jerseys are often favored in small dairies because they are compact and efficient milkers, while Holsteins produce larger volumes and may require a bigger bucket and more stamina. Dexter, Guernsey, and Brown Swiss cows can also be hand milked if they are trained and handled calmly.
This ties in closely with Silage vs Hay: Which Is Better for Dairy Cows?, worth a look if you want to go deeper.
What if the cow kicks while I’m milking?
Stop, move safely out of range, and reset the cow before continuing. Kicking can mean she is startled, uncomfortable, or not used to being milked. Check for flies, sore teats, a rough surface under her feet, or a bucket that is too close. A calm routine and consistent handling usually reduce kicking over time.
Should I wash the cow’s udder before every milking?
Yes. Cleaning the udder and teats before milking is one of the simplest ways to reduce dirt and bacteria in the milk. Use warm water and a clean towel, and make sure the teats are dry before you begin. Milking a wet or dirty udder can make sanitation much harder.
How do I know if the milk is safe to keep?
Check the first streams for flakes, clots, blood, or unusual wateriness, and watch the cow’s udder for heat, swelling, or pain. If you see anything suspicious, do not mix that milk with the main batch. In a dairy setting, abnormal milk should be treated as a possible mastitis sign and handled separately.
This article is for general information and isn’t a substitute for advice from a qualified veterinarian or dairy professional, especially if your cow shows signs of mastitis, pain, injury, or abnormal milk.